サイトの改善いろいろ
投稿日:2025/8/24
やること
- YouTube動画を記事中に埋め込めるようにする
- 画像、gif、動画のUIコンポーネントを作る
- キャプションをつけたいだけ
eyecatch用の画像をpublicからsrcに移す- サイトマップの作成
YouTubeの埋め込み
astro-embed-youtubeというコンポーネントを利用する。
公式ドキュメントに則って作業を進める。
$ npm install @astro-community/astro-embed-youtube終わり。
---
title: "YouTubeの埋め込み"
---
import { YouTube } from "@astro-community/astro-embed-youtube";
<YouTube id="Jak2qiq_jJo" posterQuality="max" title="【初音ミク】 メリュー 【オリジナル】 HatsuneMiku - Meru" class="mx-auto"/>画像、gif、動画のUIコンポーネント
画像
<Picture/> は <Image/> の完全上位互換っぽい。
---
import { Picture } from "astro:assets";

type Props = {
    src: any;
    alt: string;
    caption?: string;
    figureClass?: string;
    [key: string]: any;
};

const { caption, figureClass, ...rest } = Astro.props as Props;
const userClass = rest.class;
delete (rest as any).class;
---

<figure class={figureClass}>
    <Picture
        class:list={["block mx-auto md:max-w-xl lg:max-w-2xl", userClass]}
        {...rest}
    />
    {caption && (
        <figcaption class="text-center text-sm text-gray-500 mt-2">
            {caption}
        </figcaption>
    )}
</figure>
... をスプレッド構文というらしい。便利なものがあるもんで。知らなかった。
import Figure from "../../../components/Figure.astro";
import books from './books.jpg'

<Figure
    src={books}
    alt="積んでいる小説"
    caption="積んでいる小説"
/>
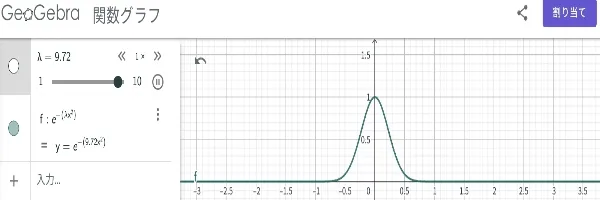
gif
.gif や .svg は <Picture/> や <Image/> で扱えるらしい。
import Figure from "../../../components/Figure.astro";
import graph from './ex1.gif';

<Figure
    src={graph}
    alt="グラフ"
    caption="グラフ"
/>
動画
---
type MaybeUrl = string | { src: string };

type VideoSource = { src: MaybeUrl; type?: string };
type VideoTrack = {
    src: MaybeUrl;
    kind?: string;
    srclang?: string;
    label?: string;
    default?: boolean;
};

type Props = {
    src?: MaybeUrl;
    sources?: VideoSource[];
    tracks?: VideoTrack[];
    caption?: string;
    figureClass?: string;
    [key: string]: any;
};

const { caption, figureClass, src, sources = [], tracks = [], ...rest } =
    Astro.props as Props;

const toUrl = (v: MaybeUrl | undefined) =>
    typeof v === "string" ? v : v?.src ?? undefined;

const resolvedSrc = toUrl(src);
const resolvedSources = sources.map(({ src, type }) => ({
    src: toUrl(src),
    type,
}));
const resolvedTracks = tracks.map(({ src, ...t }) => ({
    src: toUrl(src),
    ...t,
}));

const userClass = rest.class;
delete (rest as any).class;
---

<figure class={figureClass}>
    <video
        class:list={["block mx-auto md:max-w-xl lg:max-w-2xl", userClass]}
        {...rest}
        src={resolvedSrc}
    >
        {resolvedSources.map(
            ({ src, type }) => src && <source src={src} type={type} />
        )}
        {resolvedTracks.map(
            ({ src, kind, srclang, label, default: def }) =>
                src && (
                    <track
                        src={src}
                        kind={kind}
                        srclang={srclang}
                        label={label}
                        default={def}
                    />
            )
        )}
        お使いのブラウザは動画に対応していません
    </video>

    {caption && (
        <figcaption class="text-center text-sm text-gray-500 mt-2">
            {caption}
        </figcaption>
    )}
</figure>
webページに動画を載せたことがなかったので知らなかったんだけど、結構いろんなオプションがつけられるっぽい。すげー。
import Video from "../../../components/Video.astro";
import Lchika from './Lchika.mp4';

<Video
  src={Lchika}
  alt="Lチカ"
  caption="Lチカ"
  autoplay
  loop
  muted
  playsinline
  preload="metadata"
/>画像を public から src へ
最適化の恩恵が受けられるので、基本的に画像は public ではなく src の方に置くのが良いらしい。
アイキャッチ兼OGP画像が public に置かれているので、それを src に移す。
今までフロントマターで以下のようにアイキャッチ画像を指定していた。
---
id: "4"
title: "マイヤーの関係"
date: "2025-05-26"
updated: "2025-05-26"
eyecatch: "/blog/0004/eyecatch.png"
tags: ["物理", "熱力学"]
---
const blogCollection = defineCollection({
schema: z.object({
id: z.string(),
title: z.string(),
date: z.string(),
updated: z.string(),
eyecatch: z.string(),
tags: z.array(z.string()),
}),
}); このパスは public 以下からの相対パスなので、ビルド後もパスは変わらない。
これを src 以下に移すと、ビルド後にパスが変わって困るのだけど、 src/content/config.ts を以下のように修正すると、このパスを文字列ではなく ImageMetadata として扱えるようになる。
const blogCollection = defineCollection({
    schema: ({ image }) => z.object({
        id: z.string(),
        title: z.string(),
        date: z.string(),
        updated: z.string(),
        eyecatch: image().optional(),
        tags: z.array(z.string()),
    }),
});
src/components/BlogPostCard.astro と src/components/Layout/Layout.astro をよしなに修正しておしまい。
サイトマップの作成
公式のドキュメントに従って作業する。
$ npx astro add sitemapsrc/components/Layout/Layout.astro に以下を追加。
<head>

...

<link rel="sitemap" href="/sitemap-index.xml" />

...

</head>
public/robots.txt を作成。
User-agent: *
Allow: /

Sitemap: https://aktardigrade13-blog.pages.dev/sitemap-index.xml
Google Search Console にサイトマップを登録。
終わり。
今後の予定
目次とかはあってもいいのかな~と思ったり思わなかったり。
記事をいっぱい書いてコンテンツを充実させる方に注力したほうが良さそう。